Very often, you will have to cancel a ticket as an organizer, either because it was a test ticket, or because, for whatever reason, the attendee cannot or does not want to cancel their ticket themselves.
This is how you do it:
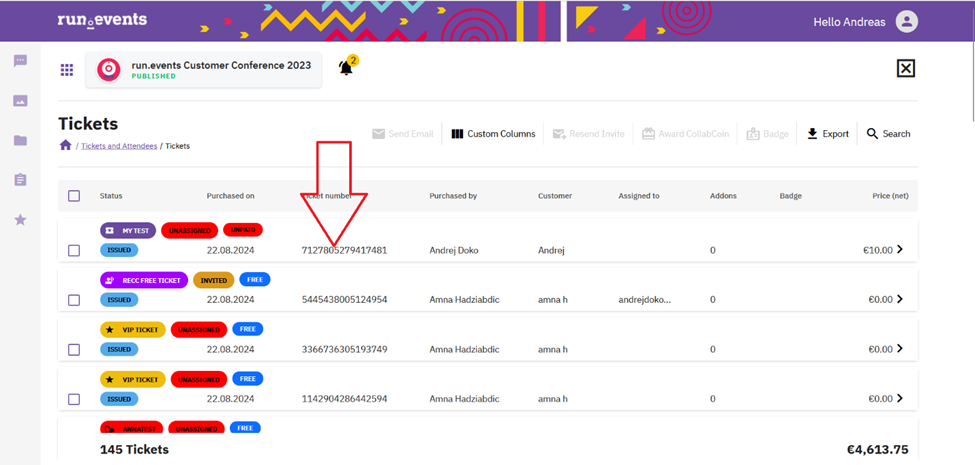
- Go to the Tickets and Attendees feature, open the Ticket list, and then click on the ticket that you want to cancel.
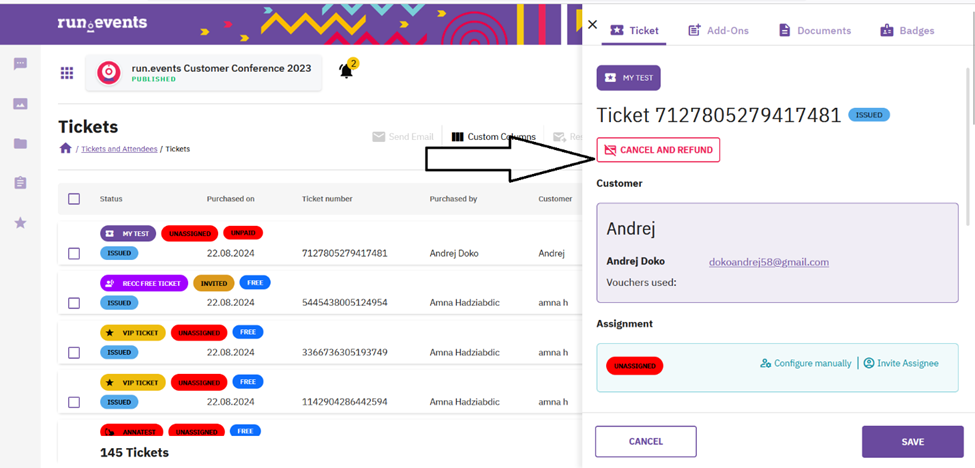
After you have done that, a well-known ticket slide-out will appear on the screen.
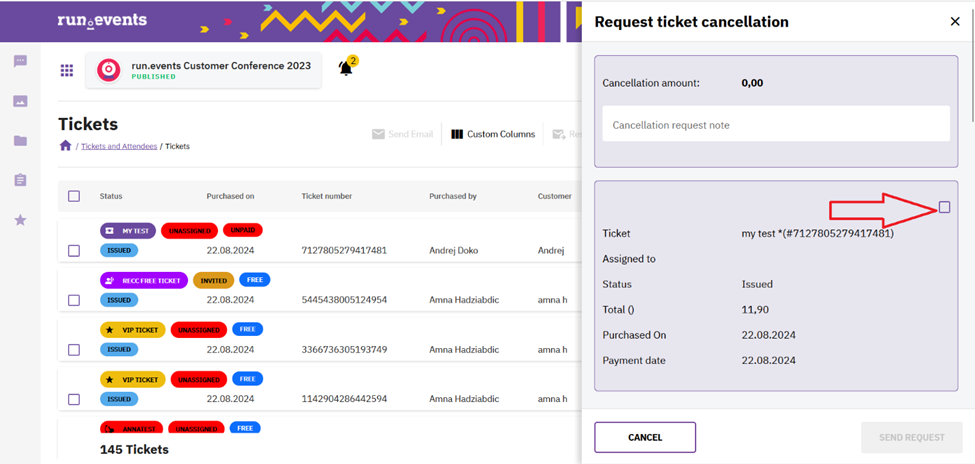
- On the Tickets tab, you will see the Cancel and Refund option. Click on it, tick the checkboxes beside the ticket(s) and/or add-on(s) that you want to cancel, and then click on the Send Request button.


- When you have done that, a cancellation request will be created, which you then need to approve in the Finances section, the same way as if it had been sent by the attendee.
The next step depends on whether there has already been a payment for this ticket.
- If you are cancelling a paid ticket that has already been fully or partially paid, you will find your newly created ticket cancellation request under Refund Requests, because you will basically be deciding whether to return money to the attendee.
CLICK HERE FOR DETAILED EXPLANATION - But if you are cancelling a free ticket, or a paid ticket that has not yet been paid, you will find the ticket cancellation request under the Cancellation Requests menu. Since there was no payment involved, you will not need to return any money. All that is eventually needed is creating an Invoice Cancellation document (if an invoice has been created).
CLICK HERE FOR DETAILED EXPLANATION


