Choosing speakers for your event can be done in two ways. You either choose them offline or decide on an open Call for Speakers. In this article, we will explain how to configure an open Call for Speakers in run.events.
On the main dashboard go to “Settings” then select “Configuration settings” and click “Session and Speaker” Tab:
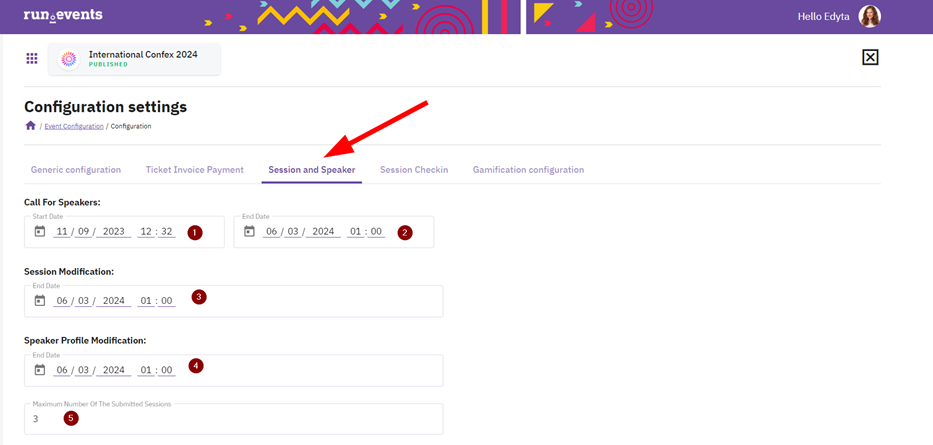
You define the Call For Speakers timeframe while providing its “Start Date” and “End Date” (1,2). Then you should decide if you allow your Speakers modify their sessions and their speaker profiles (3,4). In the next step you declare what is a maximum number of the submitted sessions by the Speaker (5).
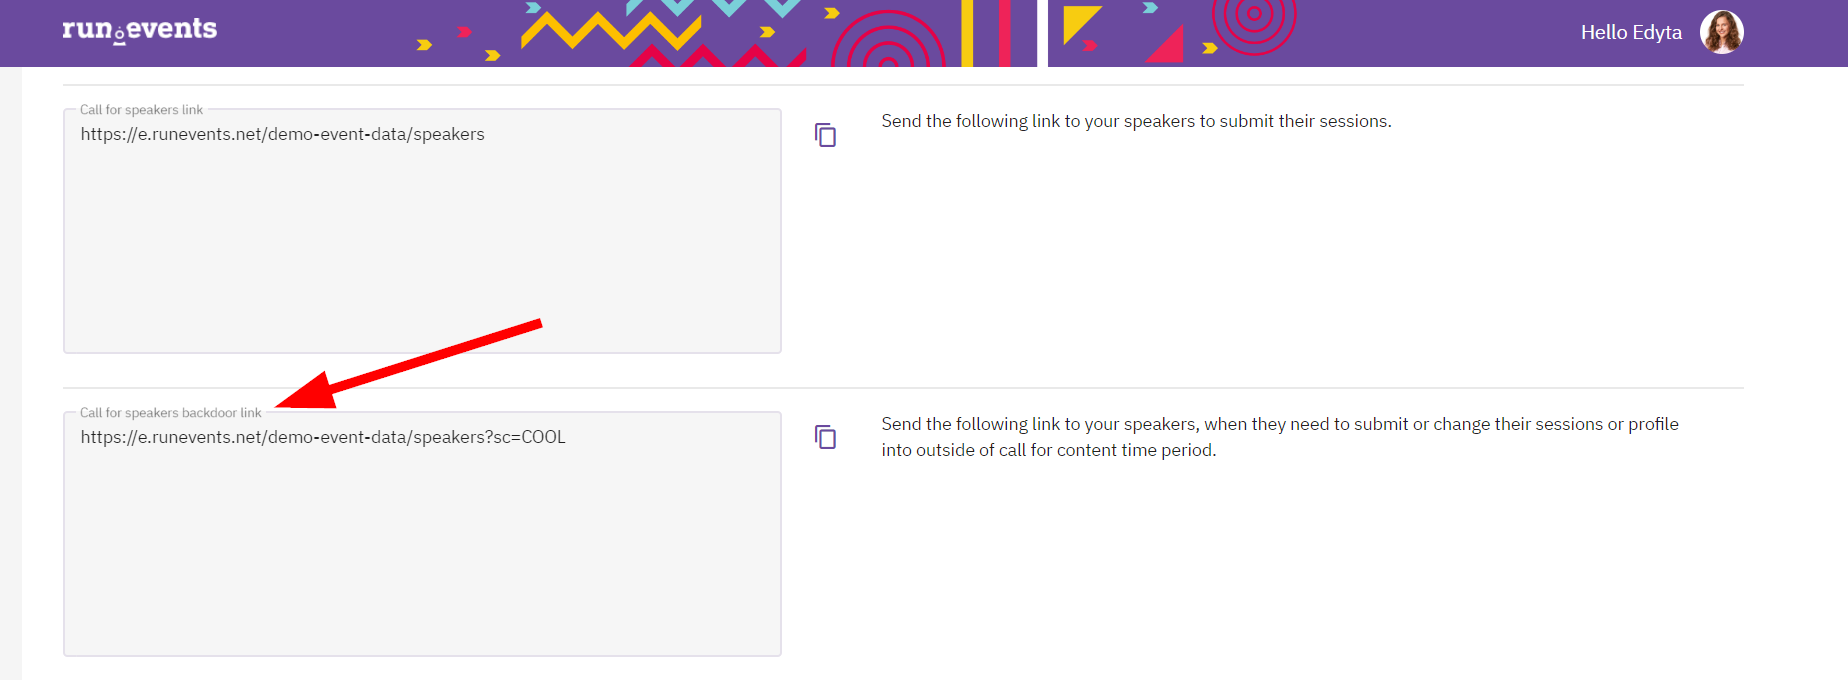
You can also include a “SECRET CODE” (6). This code is applicable in specific scenarios. For instance, if one of your preferred speakers fails to submit their session on time but you still wish to have them present at your conference, they can utilize the “Call for speakers backdoor link”. Speakers with access to this link can submit their content even after the official call for speakers has ended. The “Call for speakers backdoor link” can be located in “Settings” under “Widgets and Links”, and it concludes with the setup of your “SECRET CODE”. An example:
Getting back to “Session and Speaker” Tab:
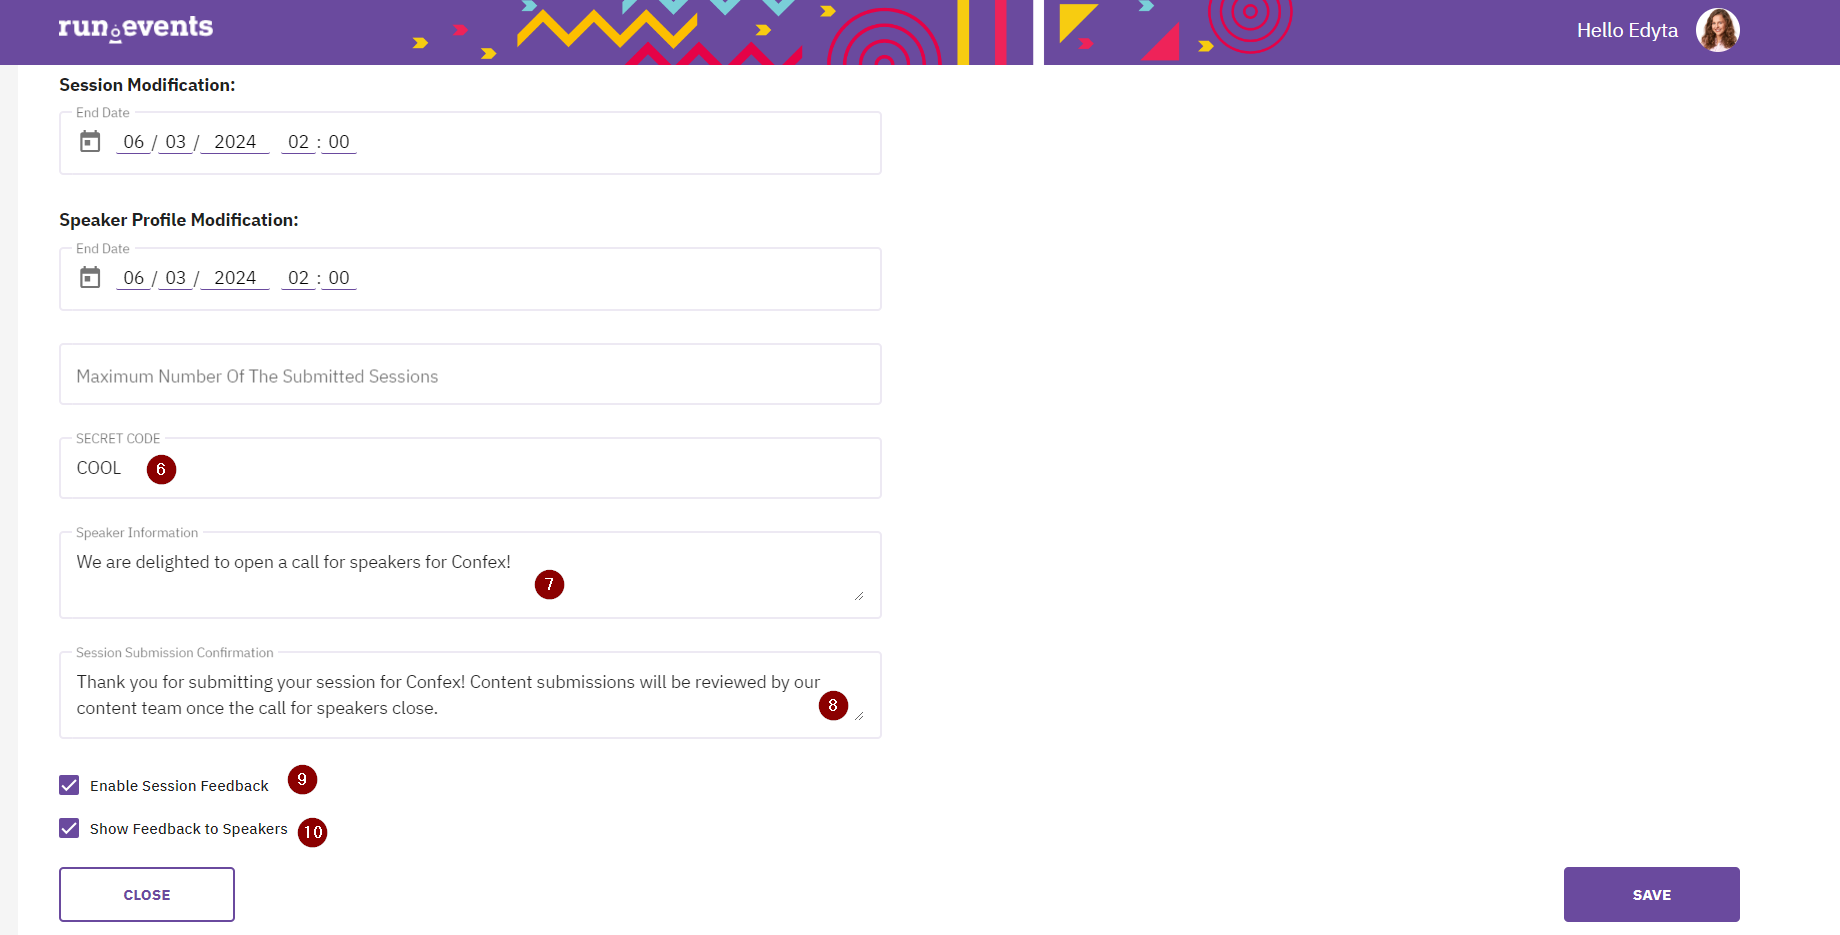
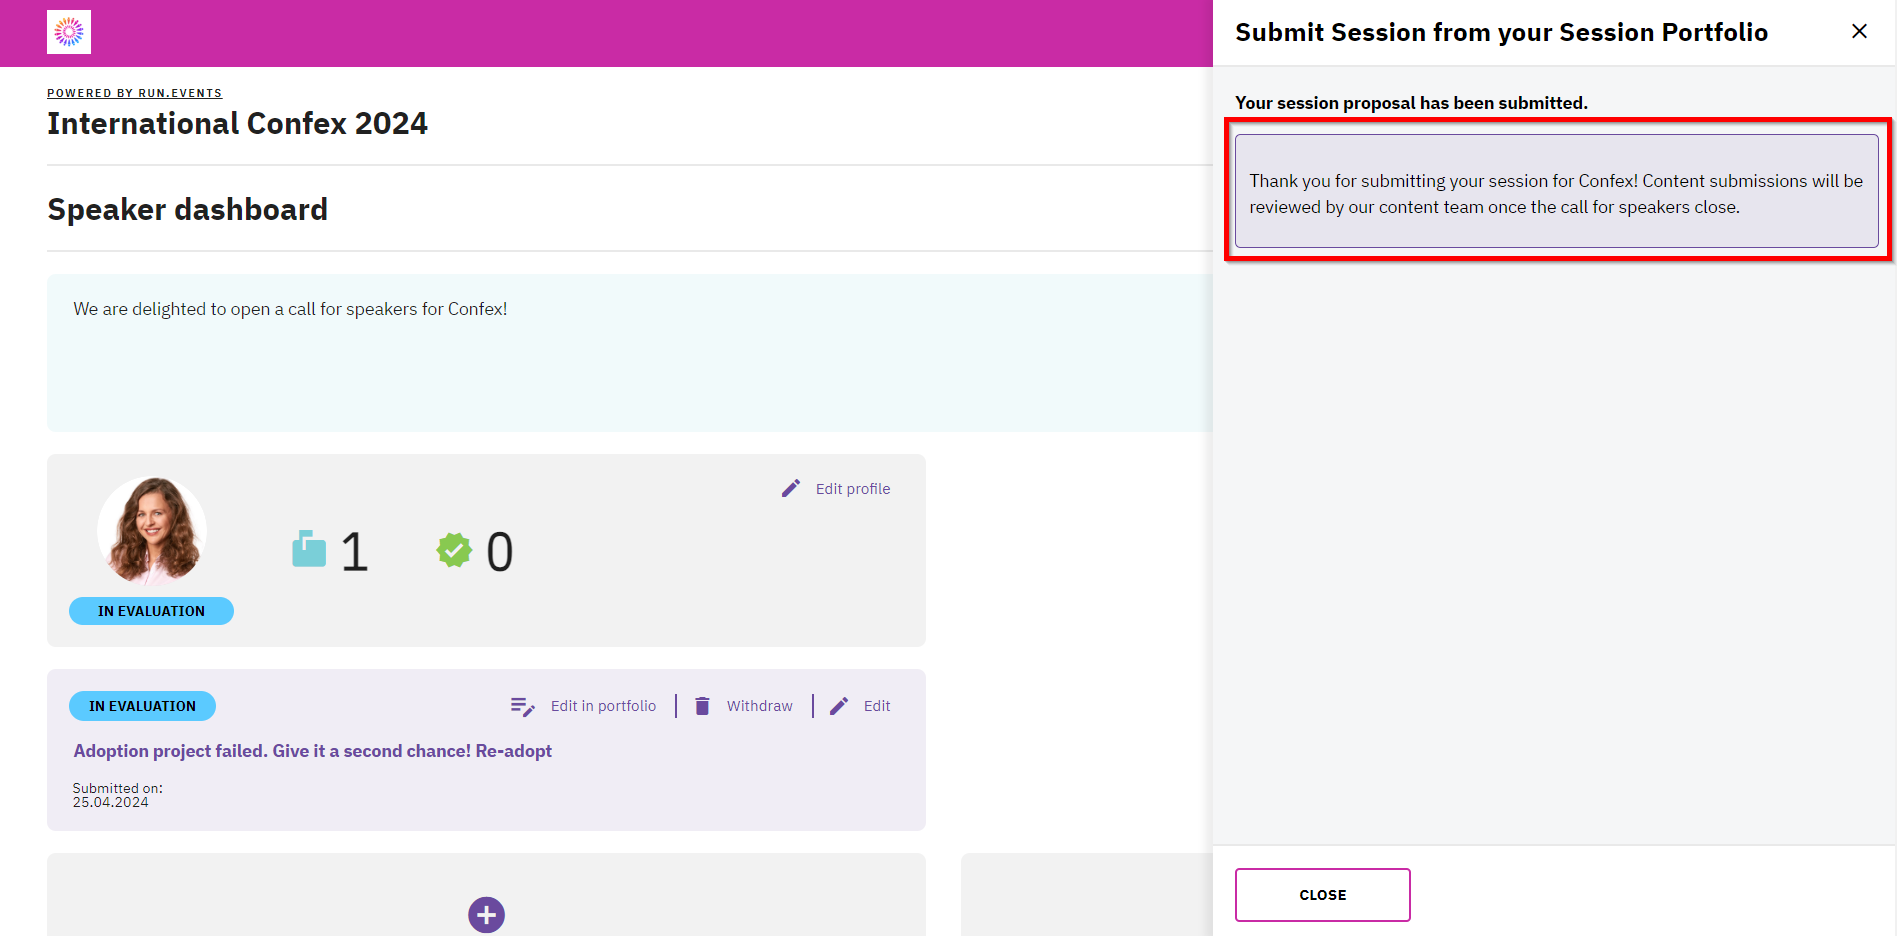
In the next steps you can define “Speaker Information” text (7) and “Session Submission Confirmation” (8) which is visible on the Speaker dashboard after submitting the session. And example how it looks:
You can also decide if you wish to “Enable Session Feedback” (9) and “Show Feedback to Speakers” (10). If you wish to review feedback first, clean it up from any irrelevant comments, please unclick "Show Feedback to Speakers" and remember to active it later after the conference.
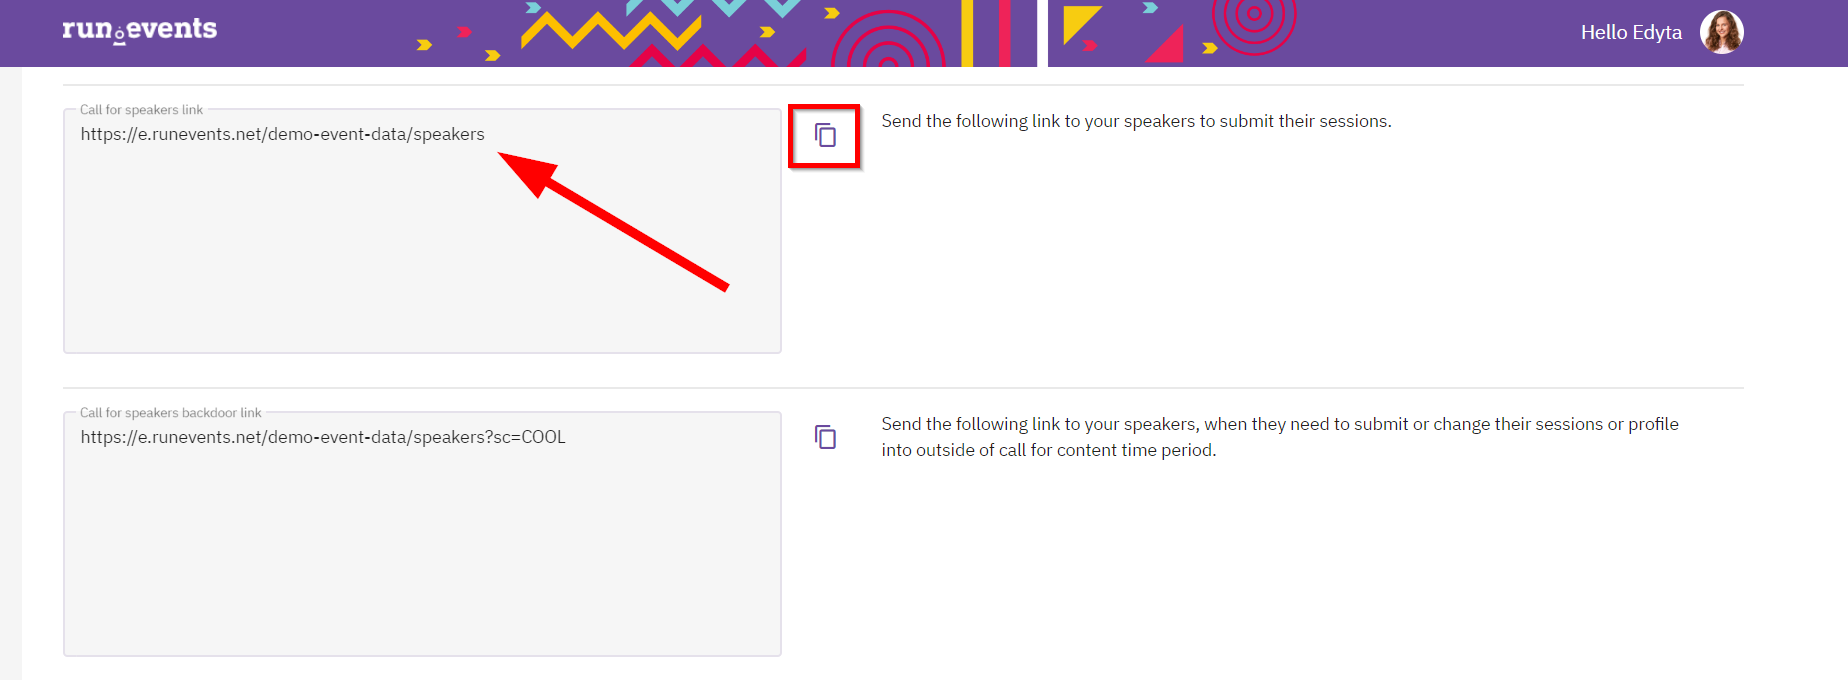
When all your configurations are ready you can find your official “Call for Speakers” link in in “Settings” under “Widgets and Links” and add it to your website or share it directly with Speakers.
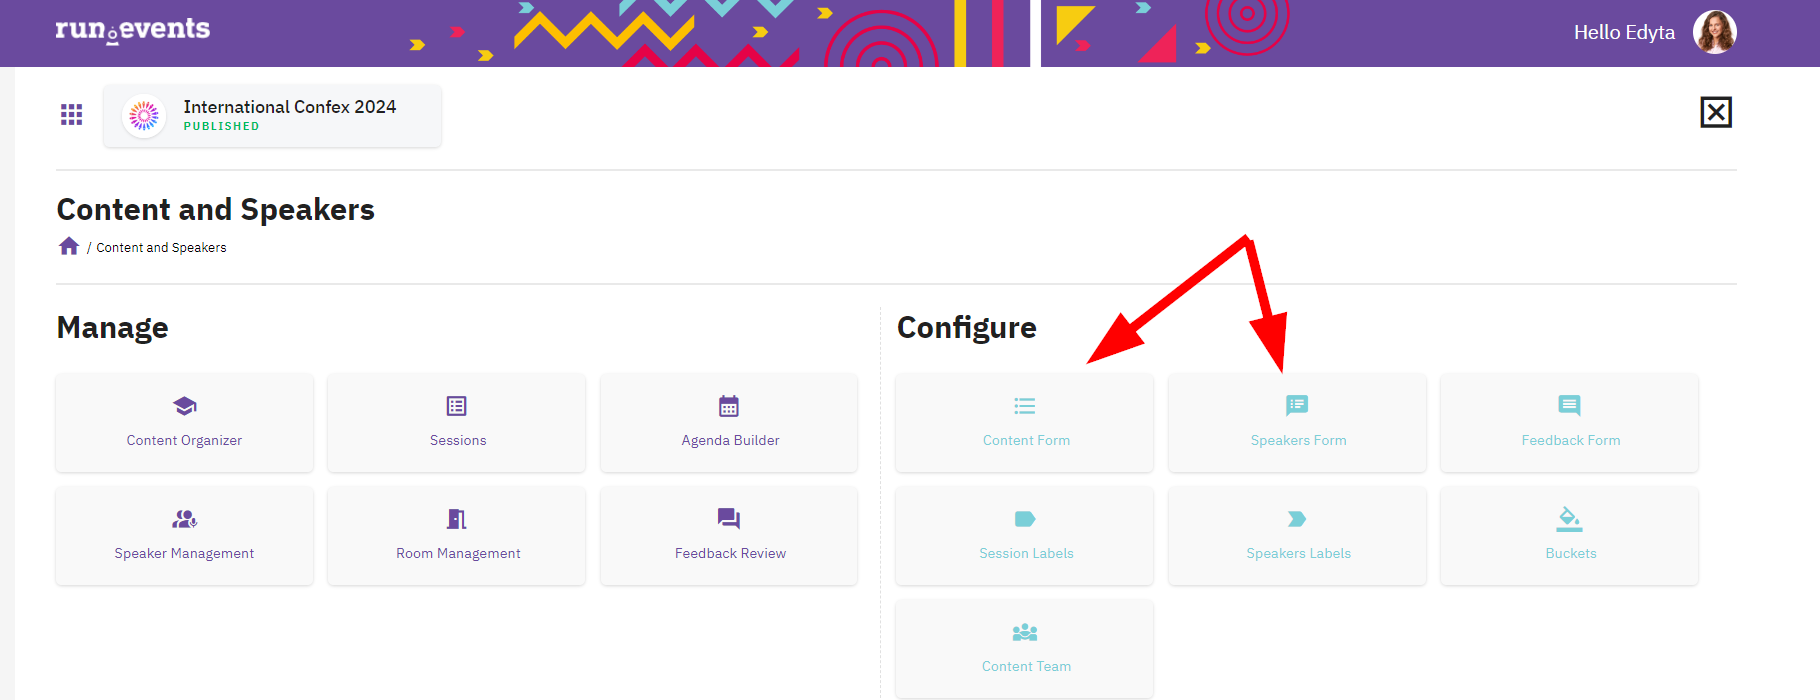
Additionally, we believe that while having Call For Speakers open you wish to gather some information about Speakers and Content. To do it you should go to “Content and Speakers” dashboard in run.events and navigate to “Content Form” and “Speakers Form”:
Content Form
In the “Content Form” you can collect information about submitted content.
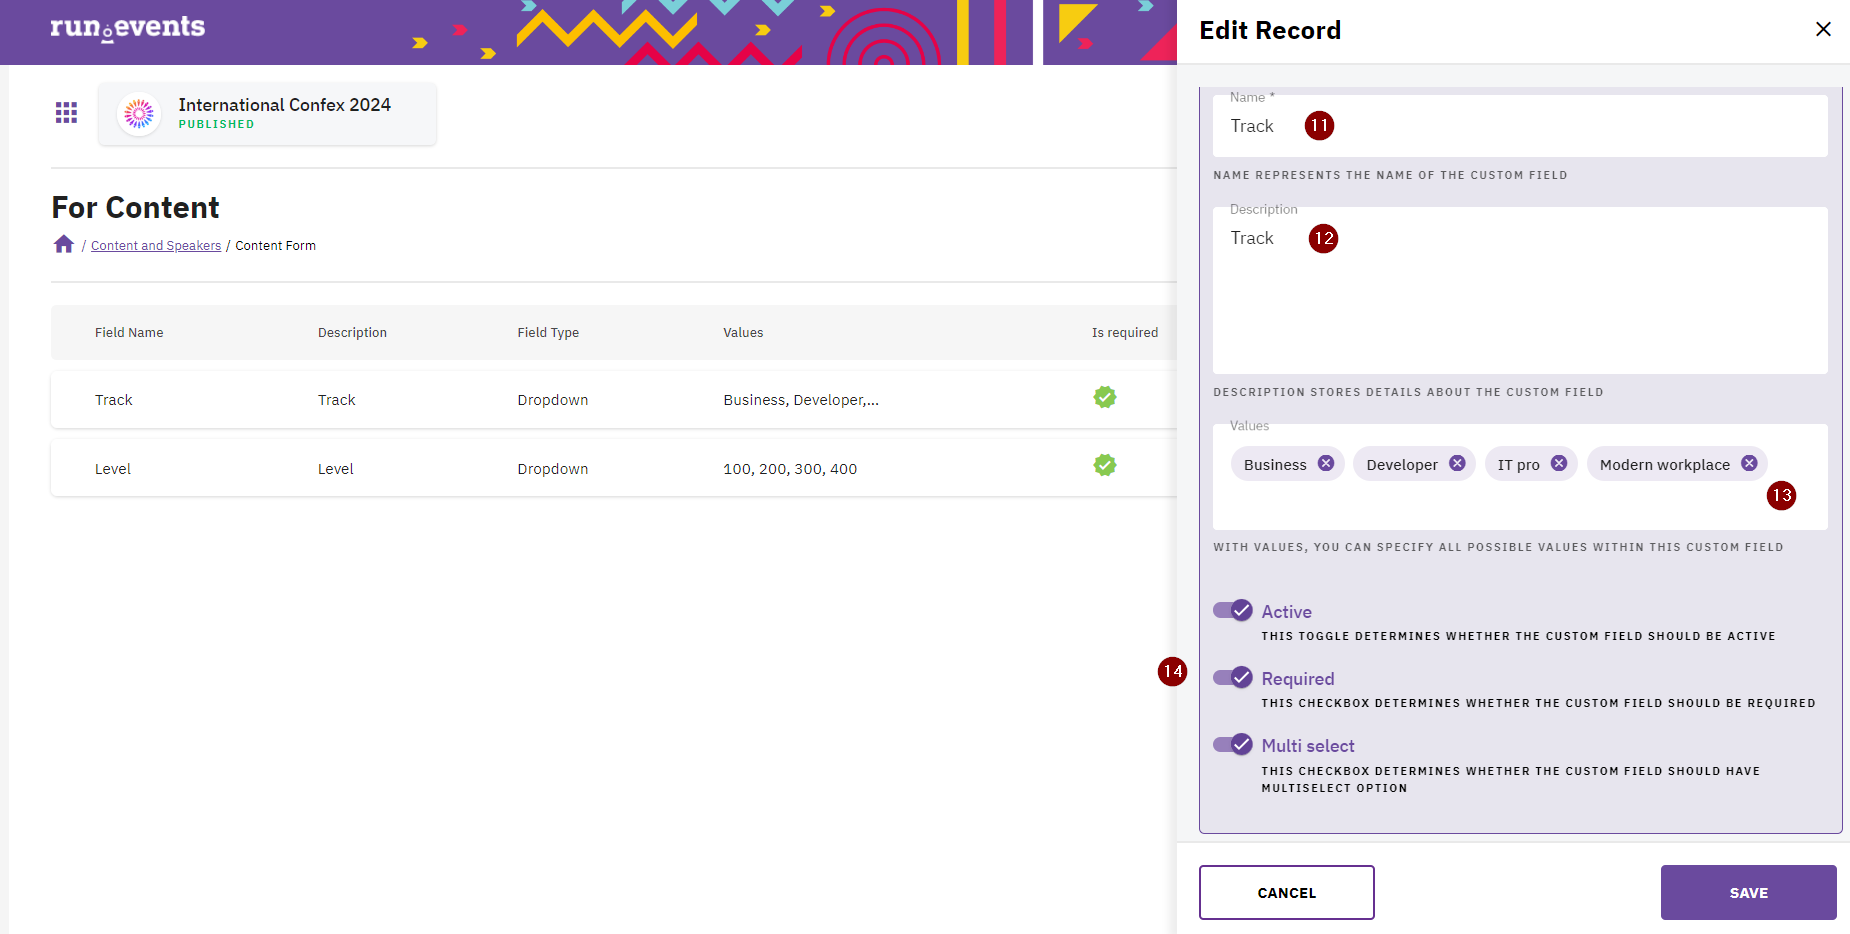
Please “Add new”. In the next steps you should provide “Name” (11), “Description” (12), “Field Type” (13) (there are many choices such as Text Field, Yes / No, Values, Drop Down etc.). And define if records should be “Active”, “Required” or/and “Multiselect” (14). Save your changes. The new record will appear on the list.
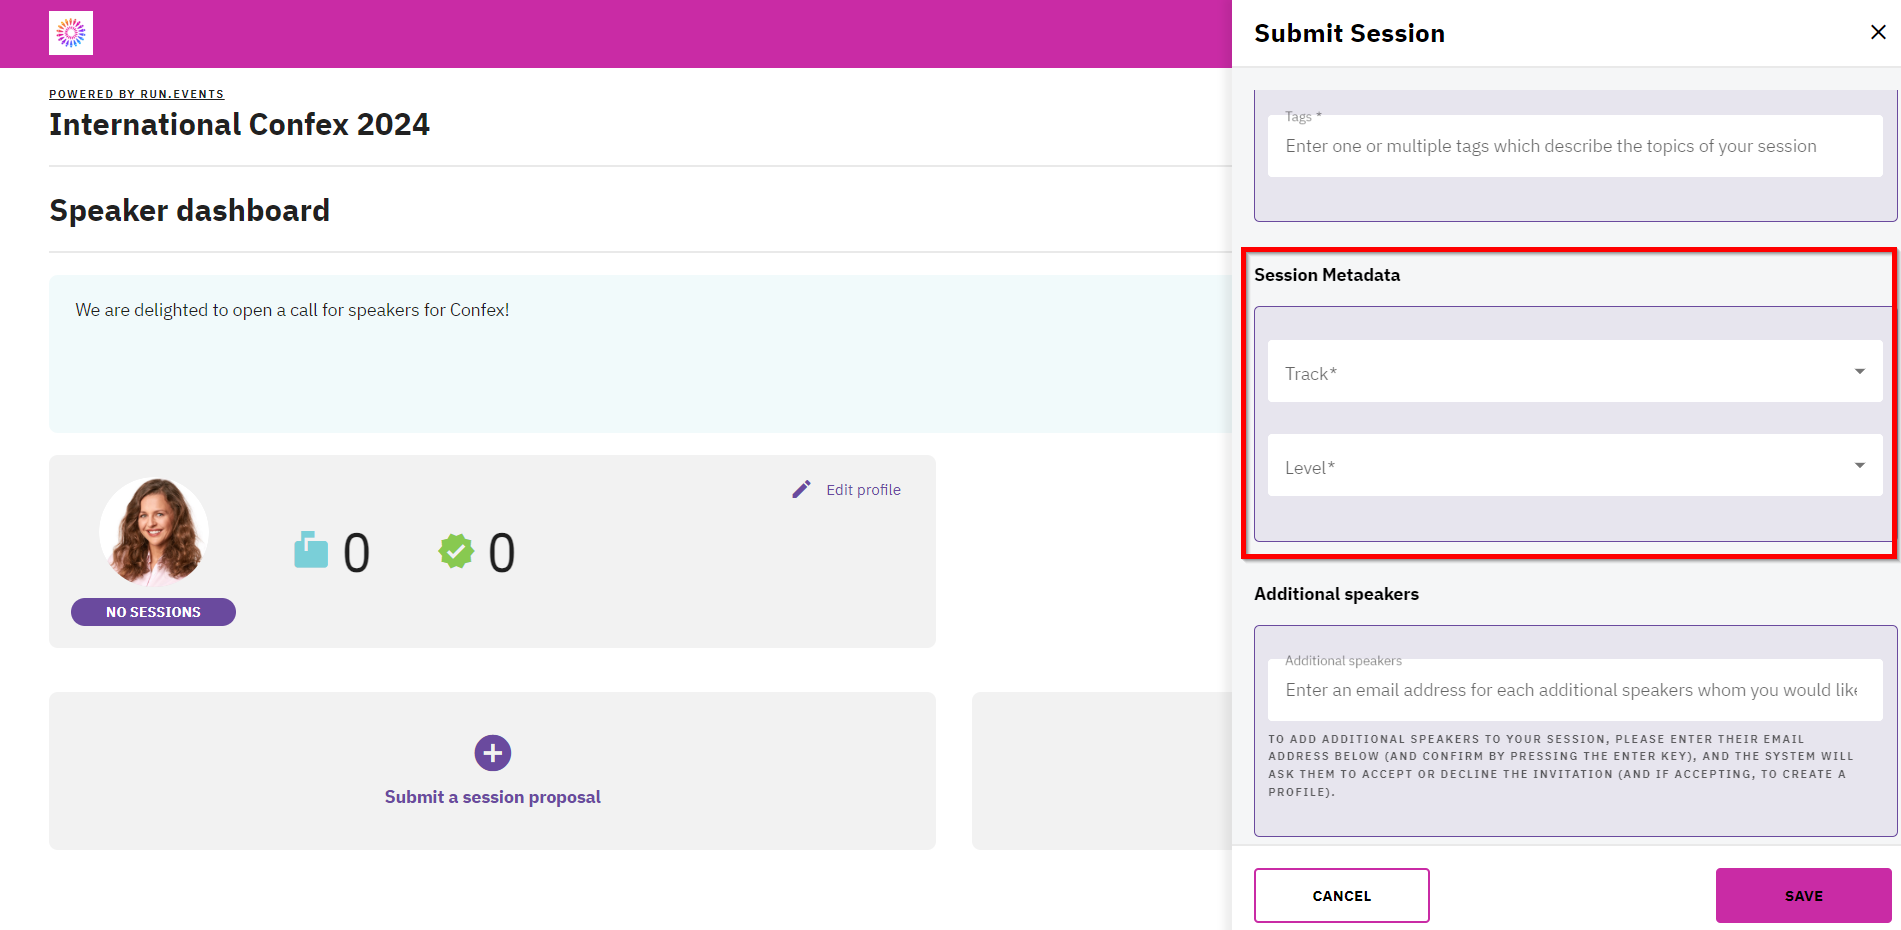
Created “Content form” will be visible on the speaker dashboard while submitting a session. An example below:
Speakers Form
Let’s navigate to “Content and Speakers” dashboard in run.events and configure now “Speakers Form”. Similar like it was in “Content Form” you should “Add new”:

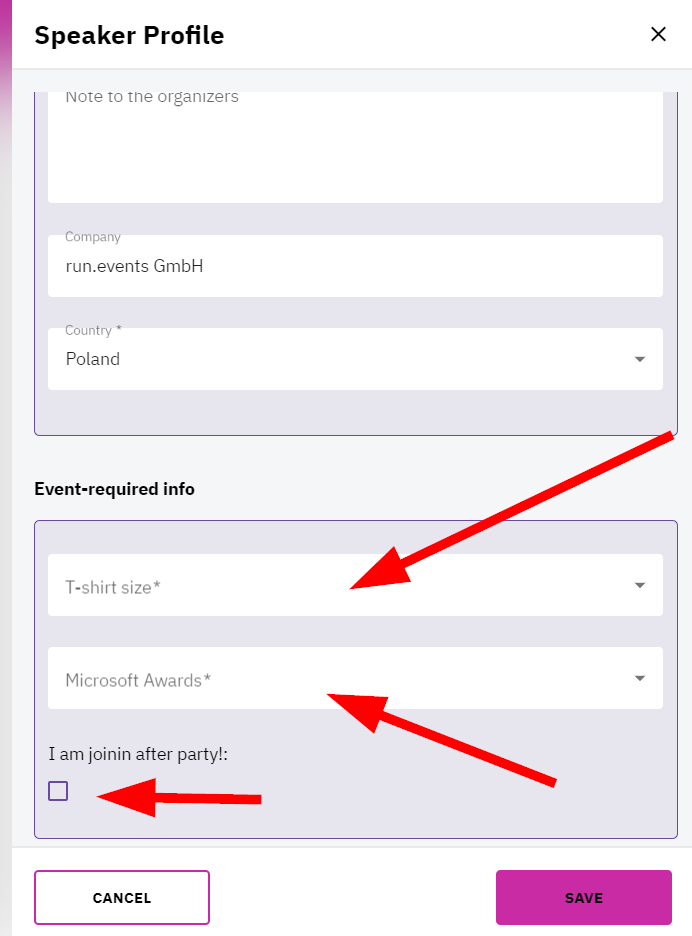
In the “Speaker Form” you can collect information about speakers. While adding new you should provide “Name”, “Description”, “Field Type” (13) (again there are many choices such as Text Field, Yes / No, Values, Drop Down etc.) and define if records should be “Active”, “Required”. Save your changes.
The “Speaker form” will become visible once the speaker creates their profile to submit a session for your event. An example of how it looks from Speaker perspective is provided below:
Learn more: Configuring content and speaker form | Content and Speakers | run.events


