In order for your speakers to make the most of your event, you should provide them with speaker tickets. We plan to automate this task in the future, but for now, it will be something that you, as an organizer, will need to handle manually.
Create Speaker Ticket Types
First things first: you will need to create speaker tickets, which you will then distribute to your speakers. Speaker tickets can be free (if your speakers are not expected to pay for their speaking engagement) or paid (for marketing events where speakers need to pay to be on the speakers list).
You will create speaker ticket types in the same way that you create any other ticket type. Go to your event home -> Tickets -> Ticket Types, click on the “Add New” icon, and choose the Ticket Type. Fill in the data for your new ticket type, but make sure to choose “Speaker” for the attendee type.
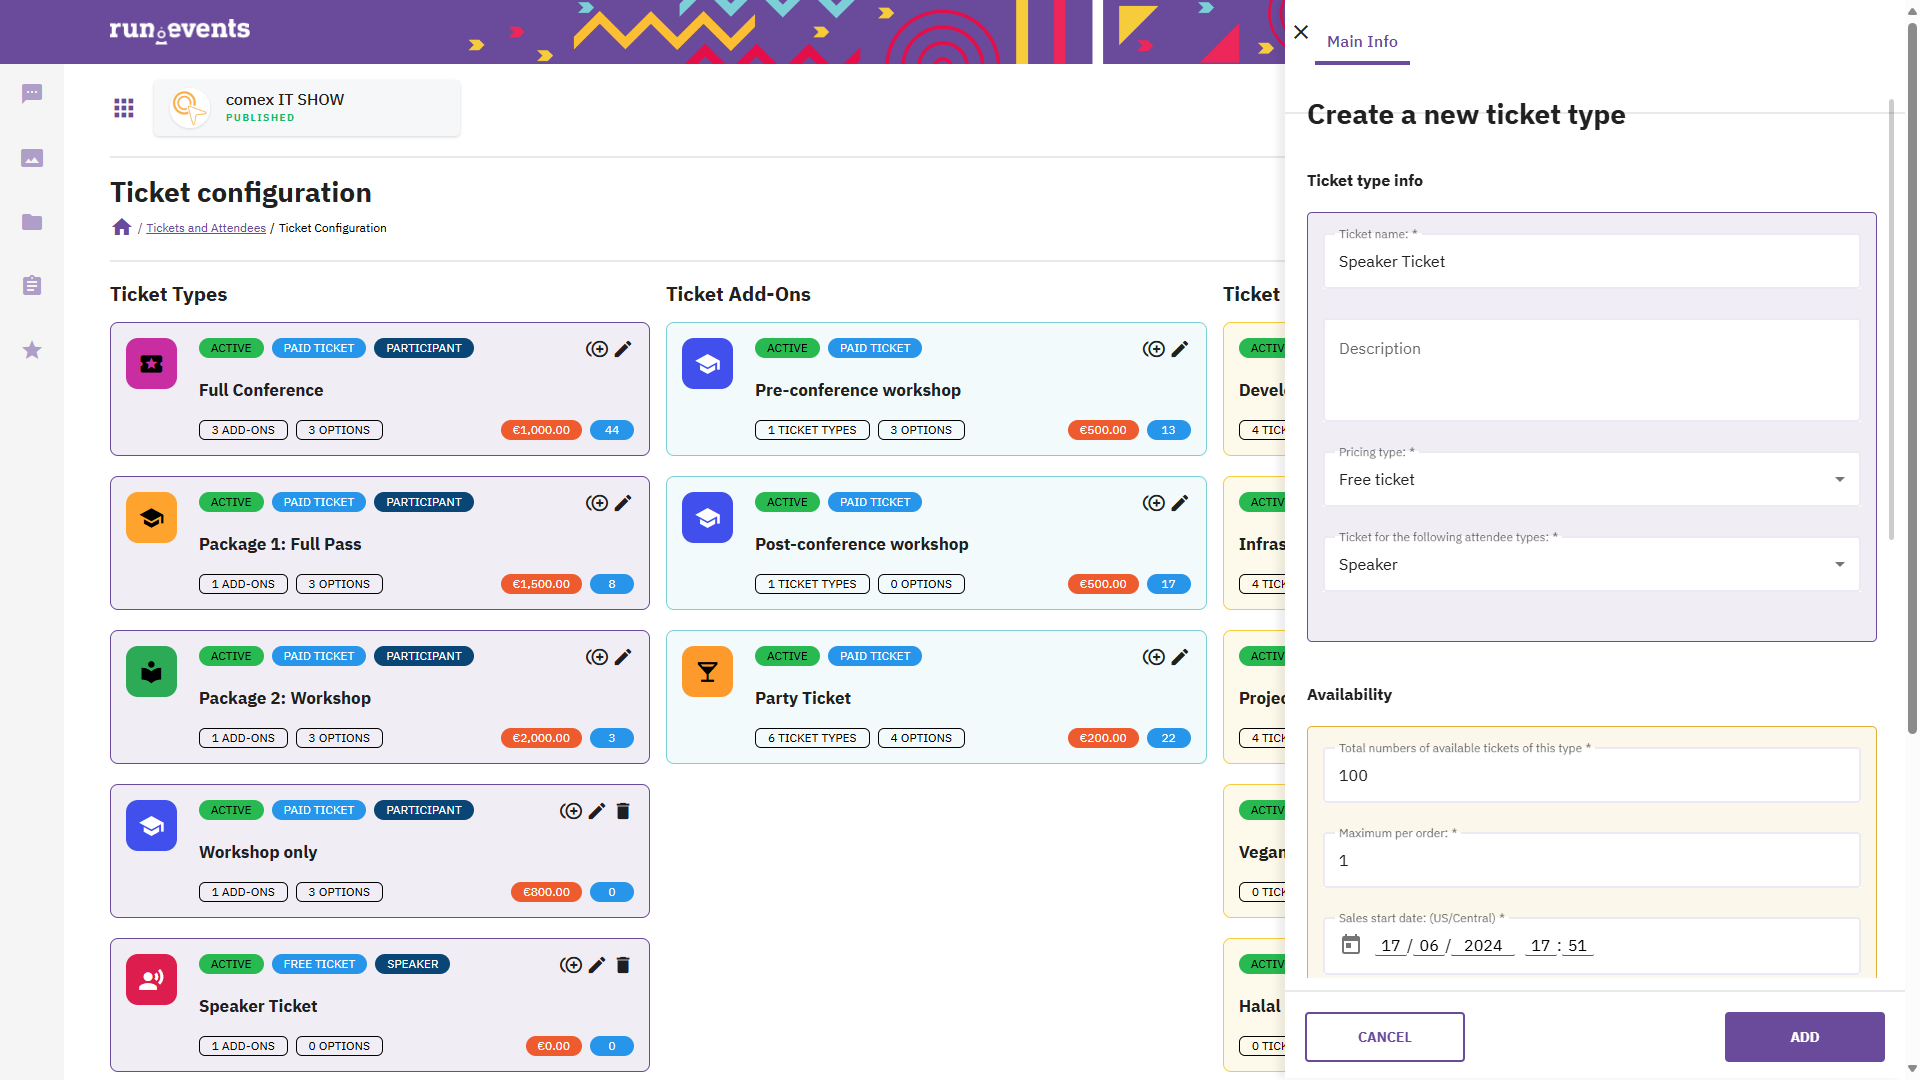
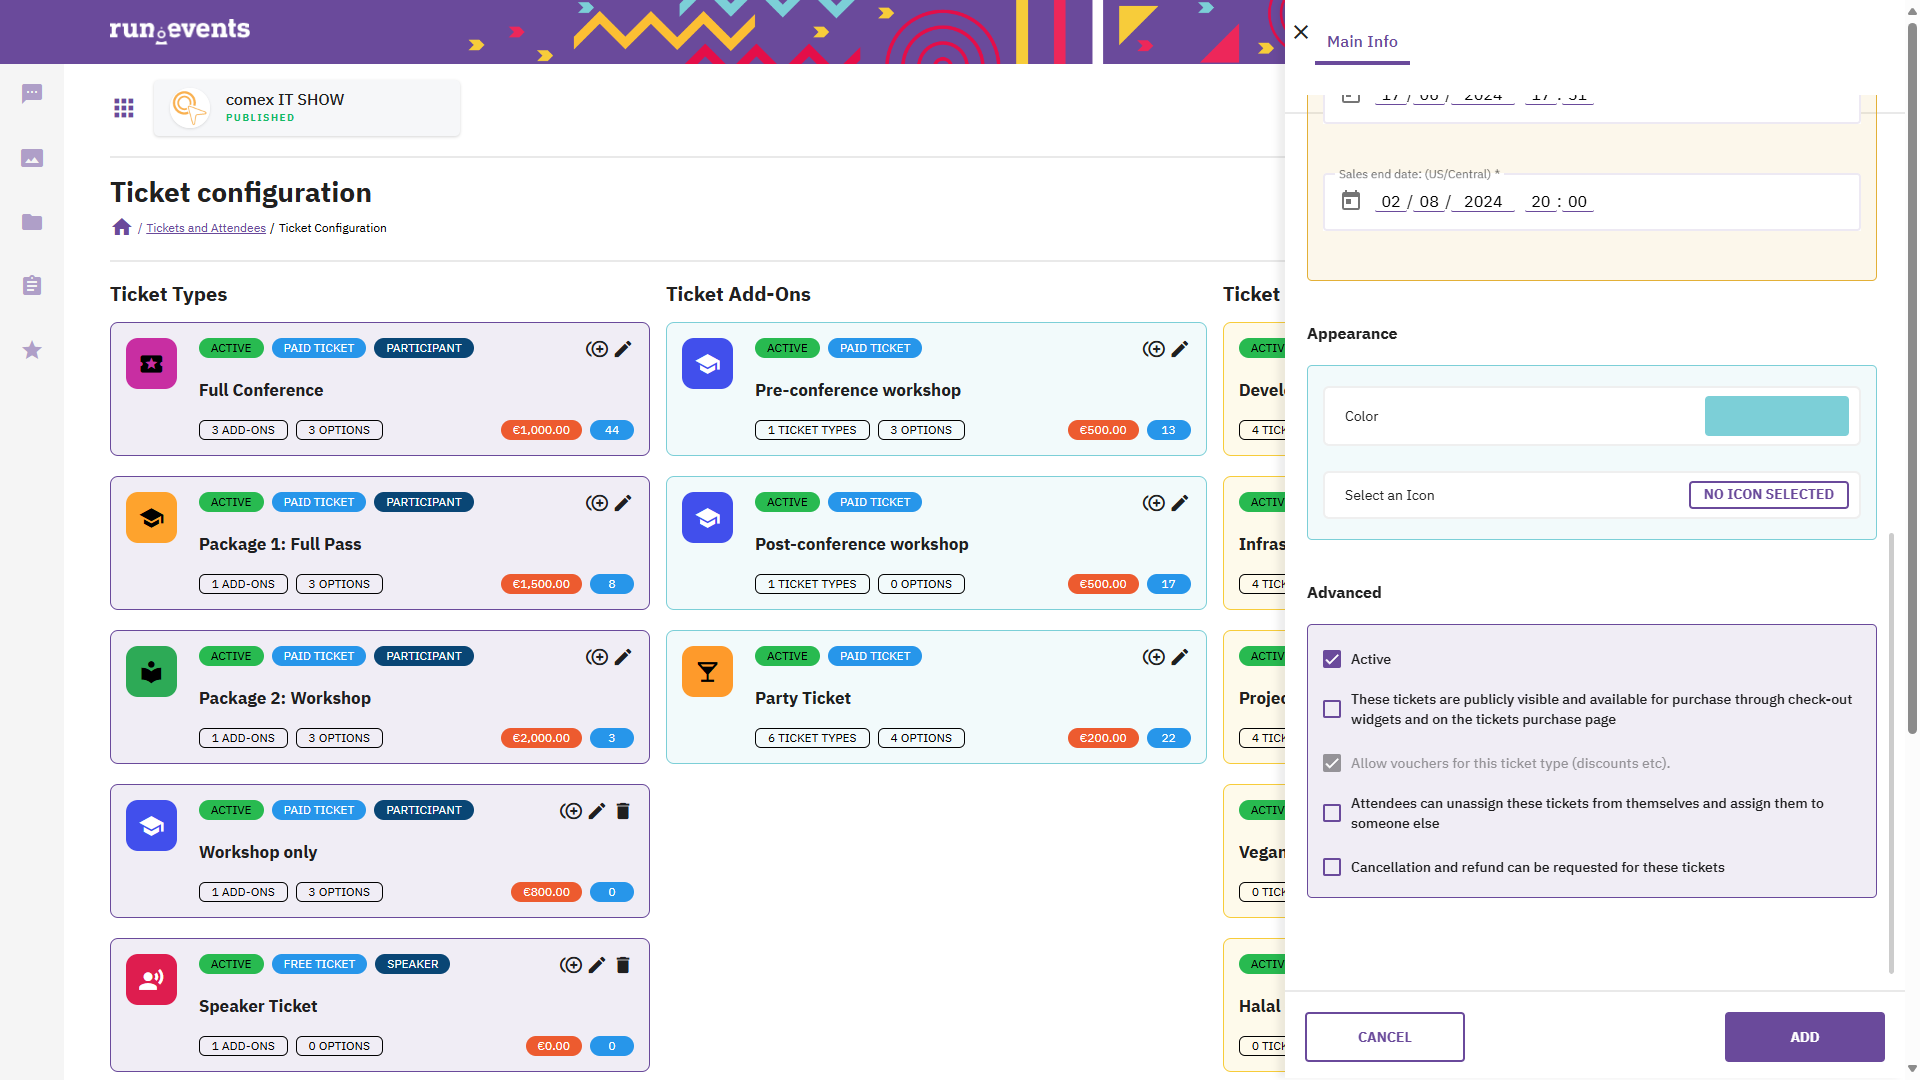
Also, pay attention to what you enter into the “Advanced” Ticket Type fields: you might not want tickets of this type to be publicly visible, and you might want to prevent speakers who have a ticket with this type from unassigning or canceling them. However, that very much depends on your scenario and your agreement with your speakers.
Once you have created and configured your speaker ticket type, you can proceed to handing out those tickets to your speakers. There are two ways to do that:
1. You can send them a voucher which they can use to obtain tickets of this type.
2. You can create the tickets yourself, and then invite the speakers to those tickets.
Using Reveal Vouchers to Provide Speakers with Tickets
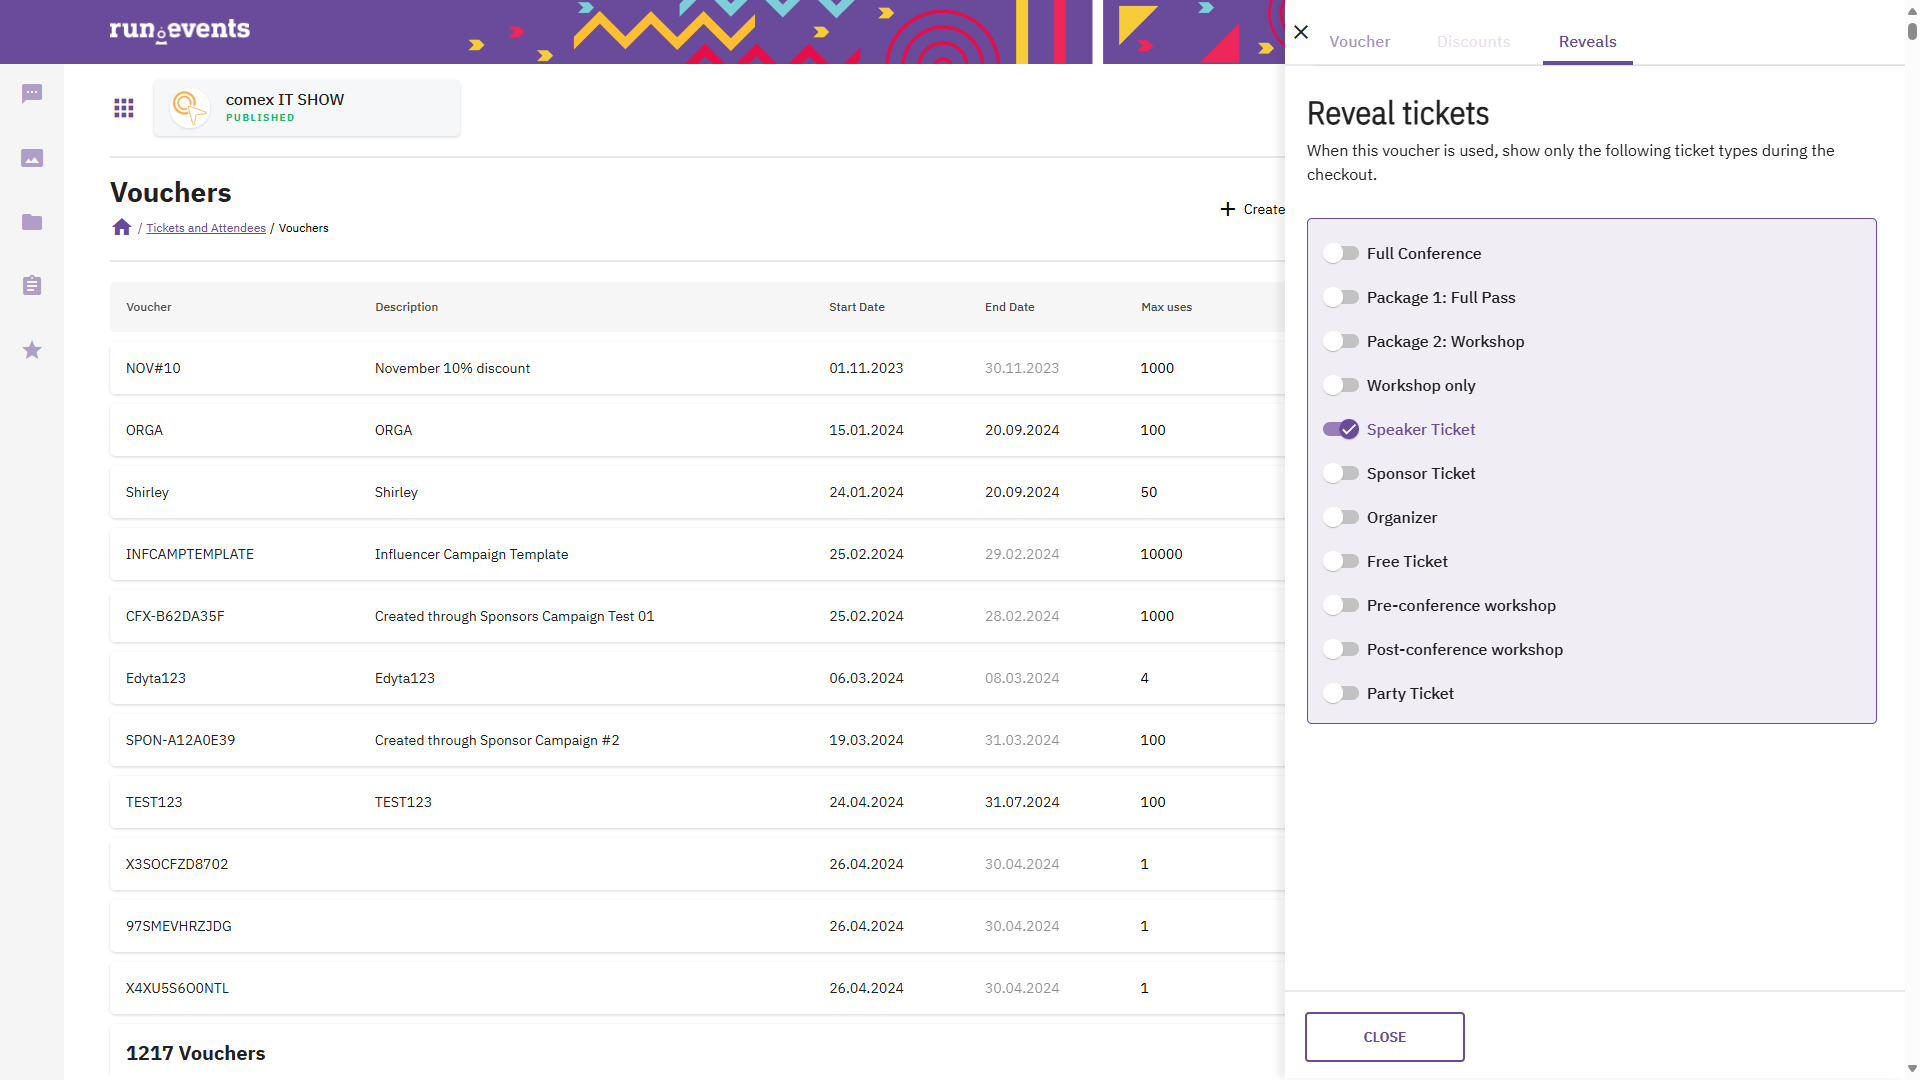
In this scenario (the most common), you will use reveal vouchers to provide speakers with their tickets. Go to Event Home -> Tickets -> Vouchers, and create a new voucher. Give it a name (e.g., “AWESOMESPEAKER”), description, maximum uses, start and end date, etc.

Be sure to select the “Reveal or hide tickets” option when creating this voucher. This will enable the “Reveals” tab, where you need to make sure to deselect all Ticket Types except – of course – the “Speaker Ticket” type.
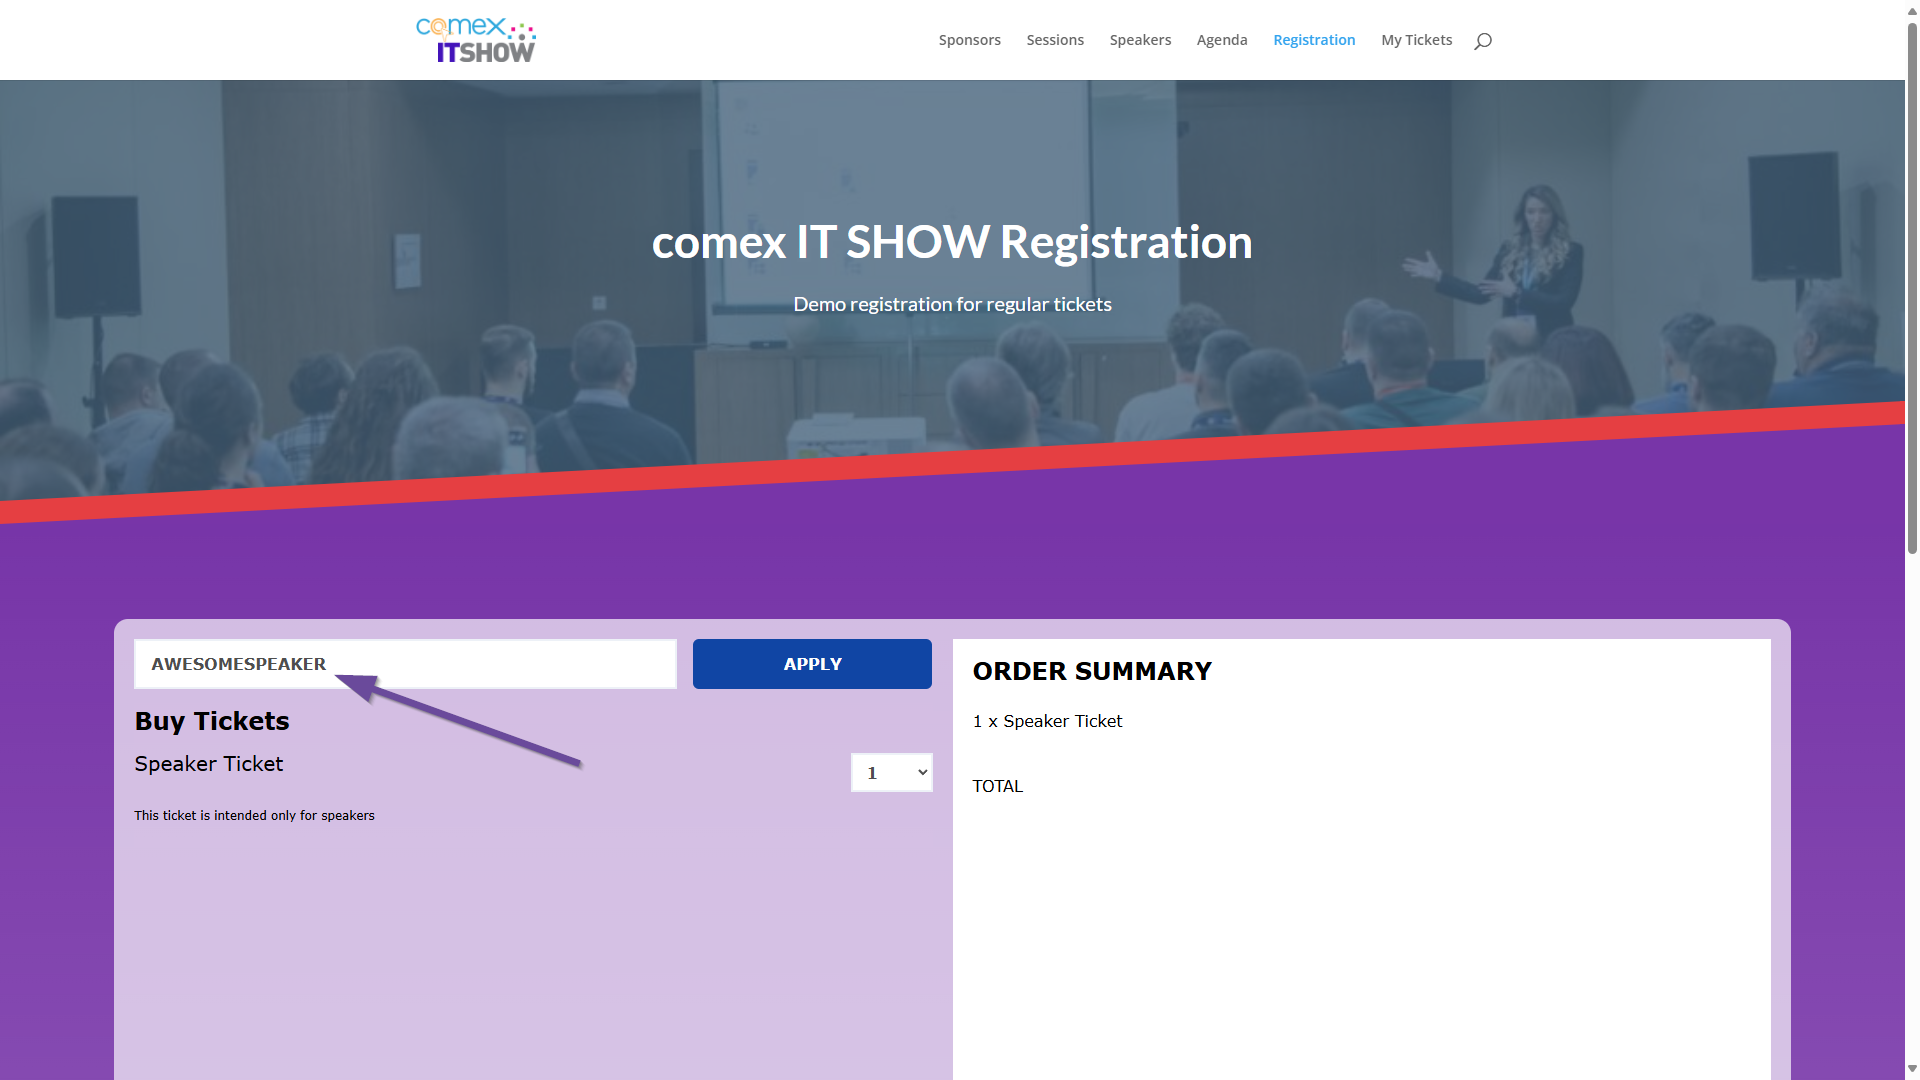
You can check if the voucher works as expected by visiting the registration page and using that voucher. If it shows only the newly created “Speaker Ticket” type, then you are good to go and can share that voucher with your speakers.
You can even create a completely separate form for your speaker registration and use the “EnforceVoucher” parameter within the tickets widget, so that speakers have their own registration page.
Creating Tickets for Speakers Yourself
The approach mentioned above will work, but it has one drawback: anyone who has access to that voucher code can create a speaker ticket. Even if highly unlikely, it can potentially happen that one of the speakers shares that voucher code with someone else, resulting in unauthorized people registering as speakers.
The workaround for this is for you, as the organizer, to obtain all the speaker tickets in your name and then assign them to individual speakers. The process is similar to the one mentioned above until the point after you create the voucher. Then, use it to “purchase” speaker tickets for all the speakers yourself. You will then see all those tickets in your own ticket dashboard, where you can assign each ticket to the individual speaker.
This approach requires a bit more work, but it gives you more security and control over the tickets.
In the Future
We are already working on a module for the automatic creation and assignment of speaker tickets to your event speakers. Stay tuned!