How Can I Manage My Tickets – Assigning, Unassigning & Personalizing Tickets
If you own tickets for an event that uses run.events for ticketing and attendee management, you can view and manage your tickets any time through run.events.
Important note: Only the original ticket purchaser can unassign and reassign a ticket.
Assigning tickets
To assign your tickets, sign in at: https://my.runevents.net/
Then open your ticket overview by following these steps:
- Choose Attendee as your role
- Select the event you are planning to attend
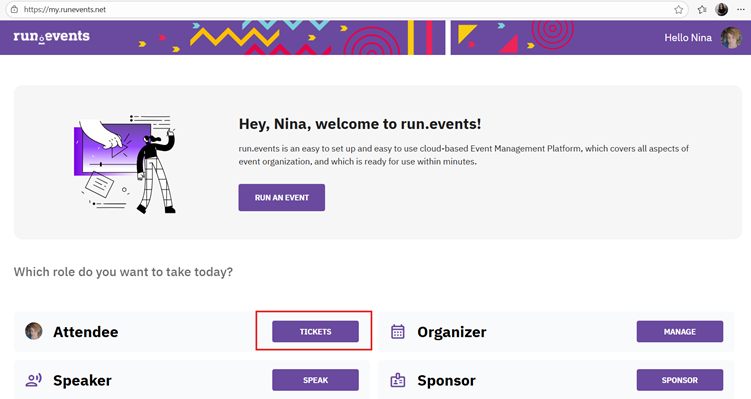
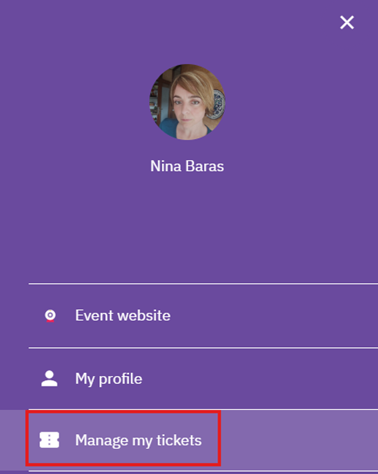
Next, go to: Manage my tickets
Click on Assign ticket.
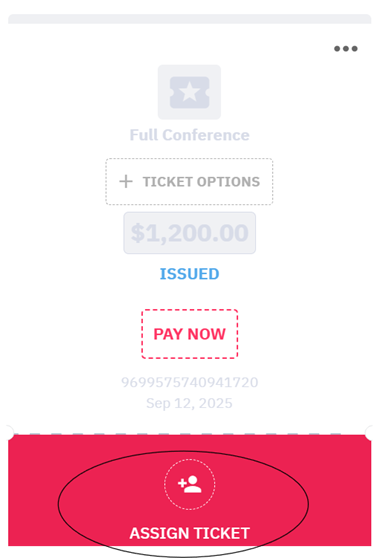
You will see two available actions:
- Assign this ticket to myself
- Assign this ticket to someone else
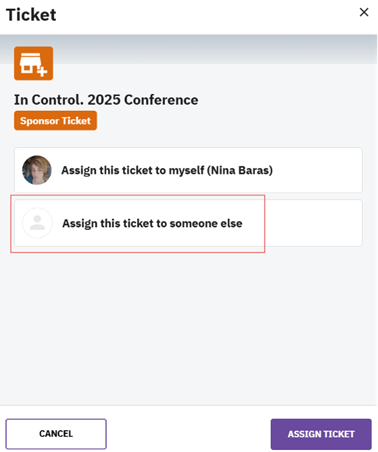
Assigning a Ticket to Someone Else
Enter the attendee’s personal data. The mandatory fields are:
- First Name
- Last Name
- Business Email Address
- Country
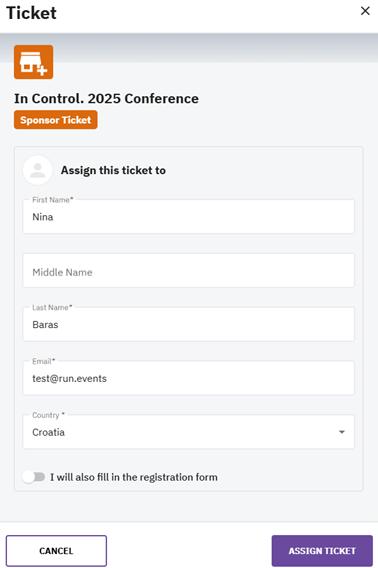
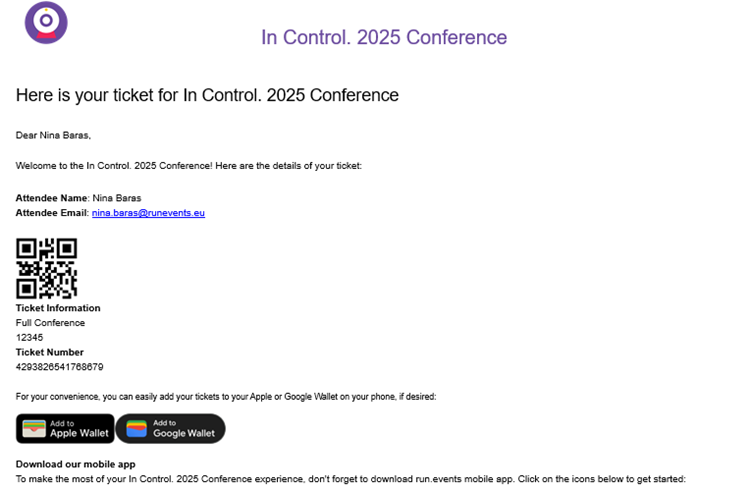
Once completed, the system automatically sends a confirmation email to the person the ticket is assigned to.
Personalizing Tickets
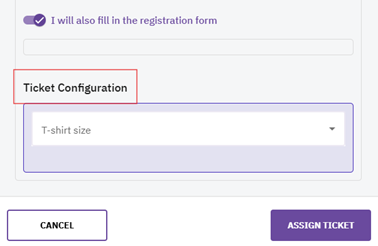
During the assignment process, you’ll have the option to fill out a registration form for your team member. To complete this on their behalf, simply toggle the option to enable this feature.
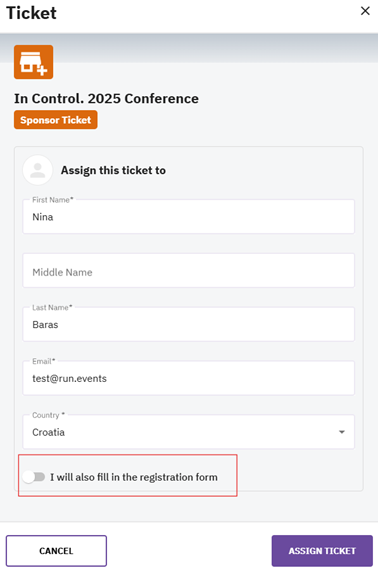
When enabled, the registration form set by the event organizer will appear. Complete the fields and click Assign Ticket to finish the process.
If you prefer your team member to handle their own registration, they will receive an email invitation and complete their form through the Attendee Dashboard.
When a ticket is assigned, the platform automatically sends a notification email to the attendee informing them of the change.
Account and Login Note
You and your team members will be asked to sign in to your existing run.events account or create one if you don't already have one. Make sure to remember which login you used, as the most common issue occurs when attendees use a different account that is not connected to their ticket or sponsorship.
Unassigning a Ticket
Assigning tickets is not permanent. You can unassign and reassign tickets at any time, allowing you to replace colleagues who cannot attend with other team members.
To unassign a ticket:
- Click on the Unassign ticket link
- The ticket will become available again for reassignment.
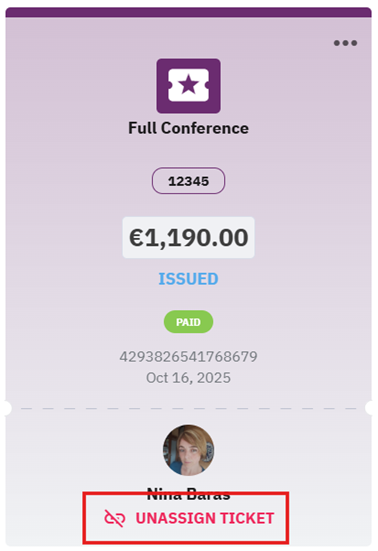
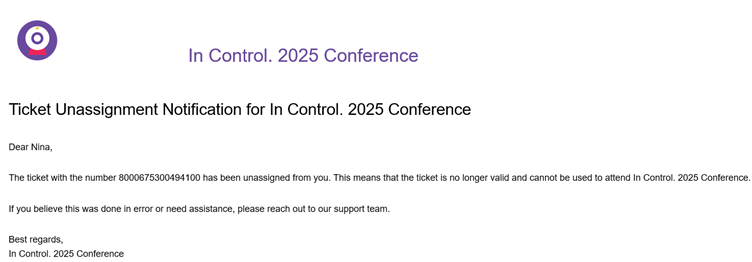
When a ticket is unassigned, the platform automatically sends a notification email to the affected individual, informing them of the change.
To assign a ticket again, click Assign ticket and repeat the earlier steps for Assigning and Personalizing tickets.
Where to Find Your Invoices
If you have purchased tickets, you will find an option under each ticket to download the invoice.
This feature ensures you always know where to access your invoice and keep your records up to date.
The downloaded invoice can be used for your personal documentation, reimbursement, or accounting purposes.

For more detailed instructions, please consult the related articles: