Printing Badges at Home (For Attendees)
Note for the event organizer: Share these instructions with your attendees to help them print their badges successfully.
Hardware Setup (for Attendees)
Attendees should ensure their printer is properly configured:
- Connect a standard laser or inkjet printer to their computer
- Install all necessary printer drivers
- Open printer preferences and set the default paper size to match the badge format
- Typically A4 or US Letter, depending on your event's configuration
Once the printer is set up, open its printing preferences and set the default paper size to match your desired badge format — typically A4 or US Letter.
Accessing Tickets
Attendees can access their print-at-home badges by following these steps:
- Visit:
https://my.runevents.net/auth/login
- Enter the email address used during event registration
- Navigate to the 'My Dashboard' tab
- Select their attendee role to view available tickets

- Choose the event for which they want to print a badge
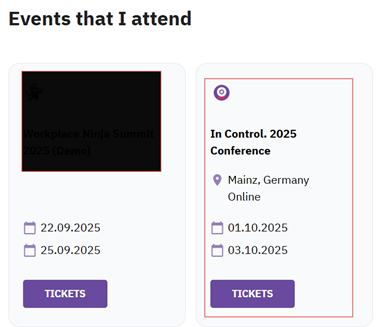
- Select the 'Print-at-Home' option under the desired ticket
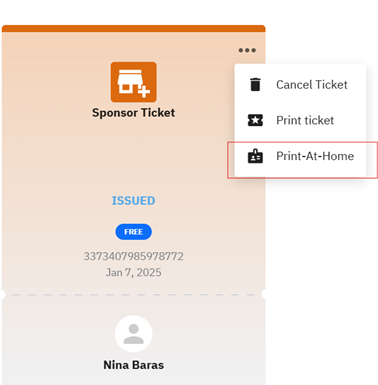
A window will open
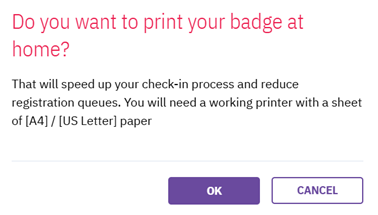
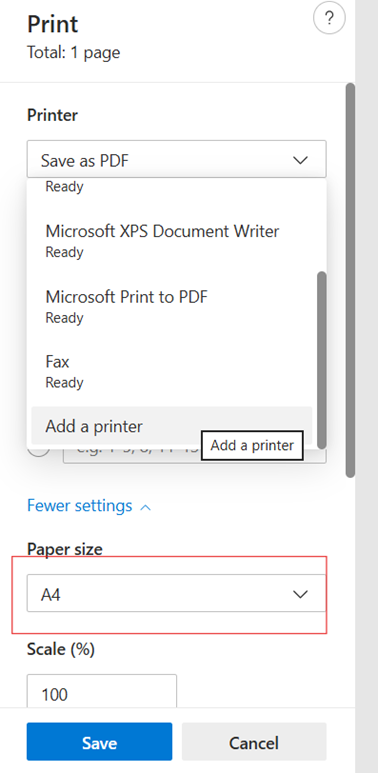
Printing the Badge
When the print dialog window opens:
- Select the appropriate printer
- Confirm paper size matches the badge format
- Click 'Print'
- Verify that the printed badge is clearly visible
- Ensure name and QR code are legible and undamaged
Tip: Advise attendees to print their badges on white or light-colored paper for optimal QR code scanning. Heavy cardstock is recommended for increased durability.
Best Practices for Print-at-Home Badges
- Clear instructions: Send detailed printing instructions in confirmation emails
- Early communication: Remind attendees to print badges several days before the event
- Backup plan: Maintain an on-site printing station for attendees who forget or are unable to print at home
- QR code size: Ensure QR codes are large enough (minimum 2 × 2 cm) for reliable scanning
- Mobile access: Consider offering digital badges as an alternative for attendees without printer access