Print-at-Home Badging (For Organizers)
Print-at-Home Badging empowers event organizers to craft personalized badges. It offers a wide range of features for designing, allowing for pre-printing before the event kicks off. Organizers can kickstart the process by configuring essential details like badge name, target people groups, and size preferences, including custom dimensions. Interface enables the addition and customization of text, images, shapes, and QR codes.
Print-at-Home Badging
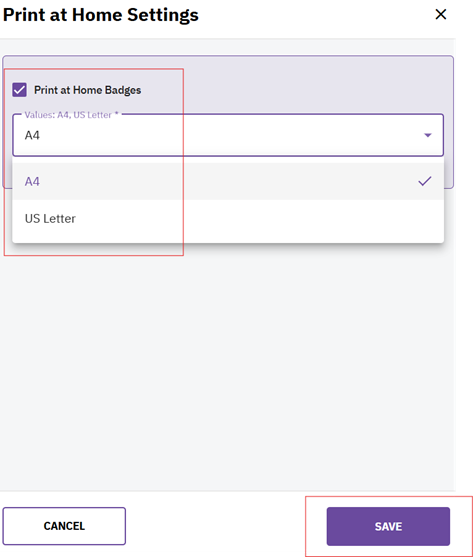
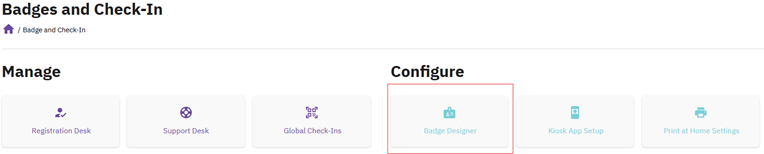
Go to: Badge and Check-In -> Print-at-Home Settings


Select Paper Size:
Before designing your badge, select the paper size that attendees will use for printing. Common options include:
- A4 (210 × 297 mm) - International standard
- US Letter (8.5 × 11 inches) - North American standard
- Custom dimensions for specialized badge formats
Important: The paper size must be selected before proceeding to badge design, as it determines the available canvas dimensions and layout options.
Create Print-at-Home Badge Design
Go to: Badge Designer -> Print-at-Home Badge
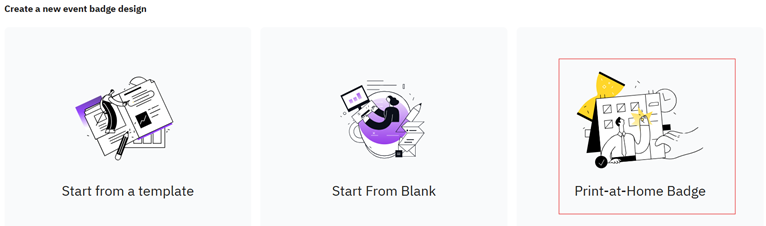
Design Options
You can create your print-at-home badge using two approaches:
- From scratch: Start with a blank canvas and build your badge from the ground up using predefined or custom dimensions
- From template: Select an existing print-at-home template and customize it for your event
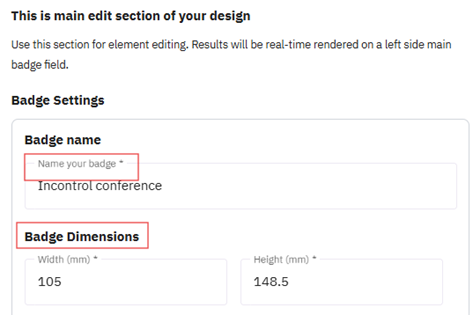
Using the Badge Designer
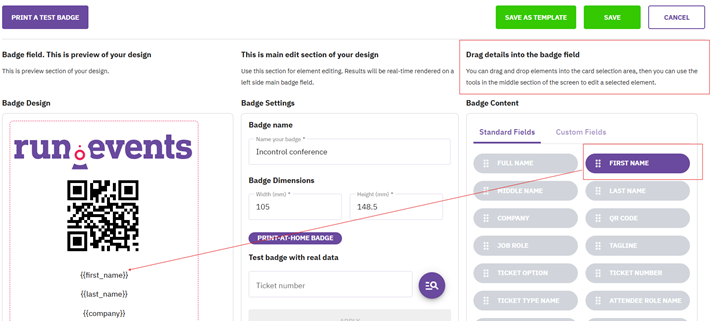
The print-at-home badge designer interface is identical to the standard badge designer (see Article 2 for detailed interface documentation) with three main sections:
- Left Section: Badge Preview - Real-time visual preview of your design
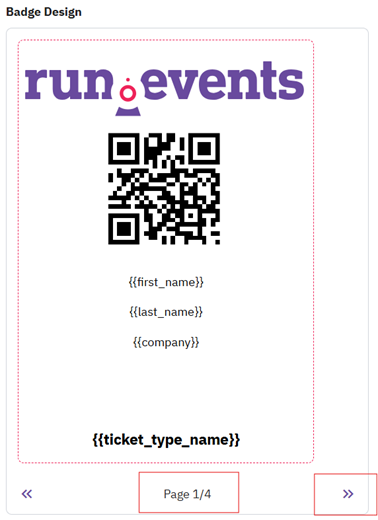
- Middle Section: Main Editing Tools - Canvas and element editing controls with real-time rendering
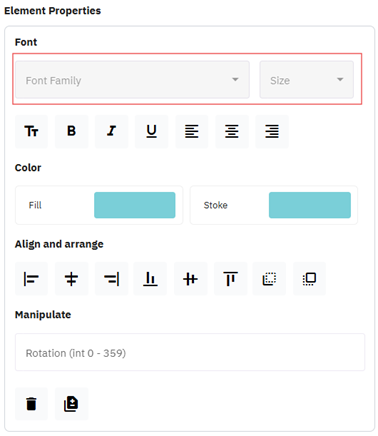
- Right Section: Elements Panel - Drag-and-drop components including text, images (SVG format supported), shapes, and QR codes
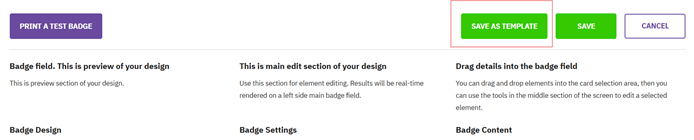
Save Your Design
Once your print-at-home badge design is complete:
- Click 'Save' to finalize the design

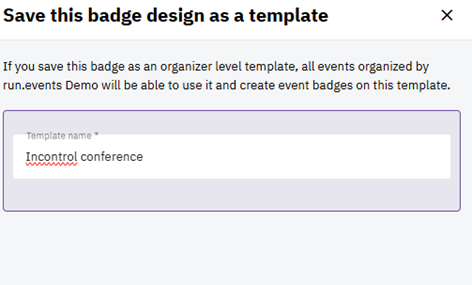
- Click 'Save as Template' if this design will serve as the foundation for other badges or future events
Test the Print-at-Home Badge Design
Before activating the badge for attendee use, test it using real data:
- Navigate to the 'Tickets' tab
- Select a ticket number from one of your attendees
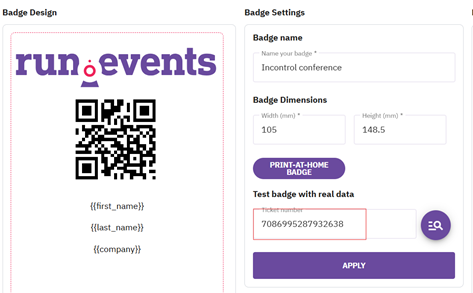
- Click 'Apply' to populate the badge with real attendee data
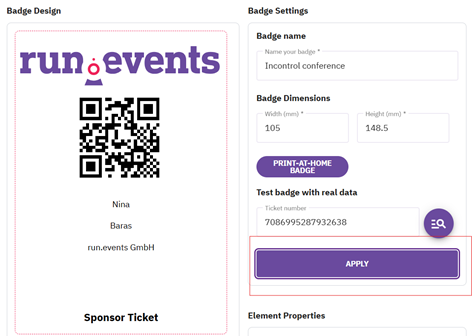
- Click 'Test Print-at-Home Badge' button

- Verify that all data fields display correctly and the badge prints properly
Important: Testing with real data ensures that dynamic fields (name, company, title, QR code) render correctly and that text does not overflow or get cut off during printing.
Assign Print-at-Home Badge to Ticket Types
Go to: Tickets → Ticket Configuration
Configuration Steps:
- Select the ticket type you want to configure
- Click the 'Edit' button
- Navigate to the 'Badge' tab
- Choose your preferred print-at-home design from the dropdown menu
- Click 'Use for this Ticket Type' to activate the print-at-home option
- Save your changes
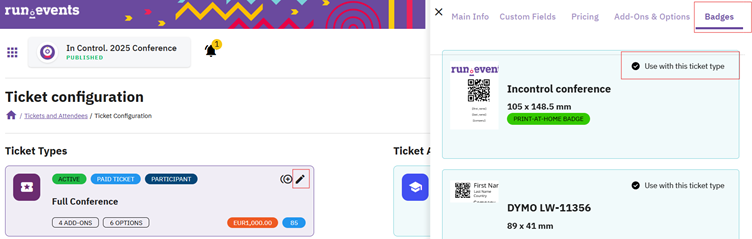
Note: Once configured, the print-at-home option becomes available for all attendees with that ticket type.
Learn more: Printing Badges at Home | For Event Attendees | run.events